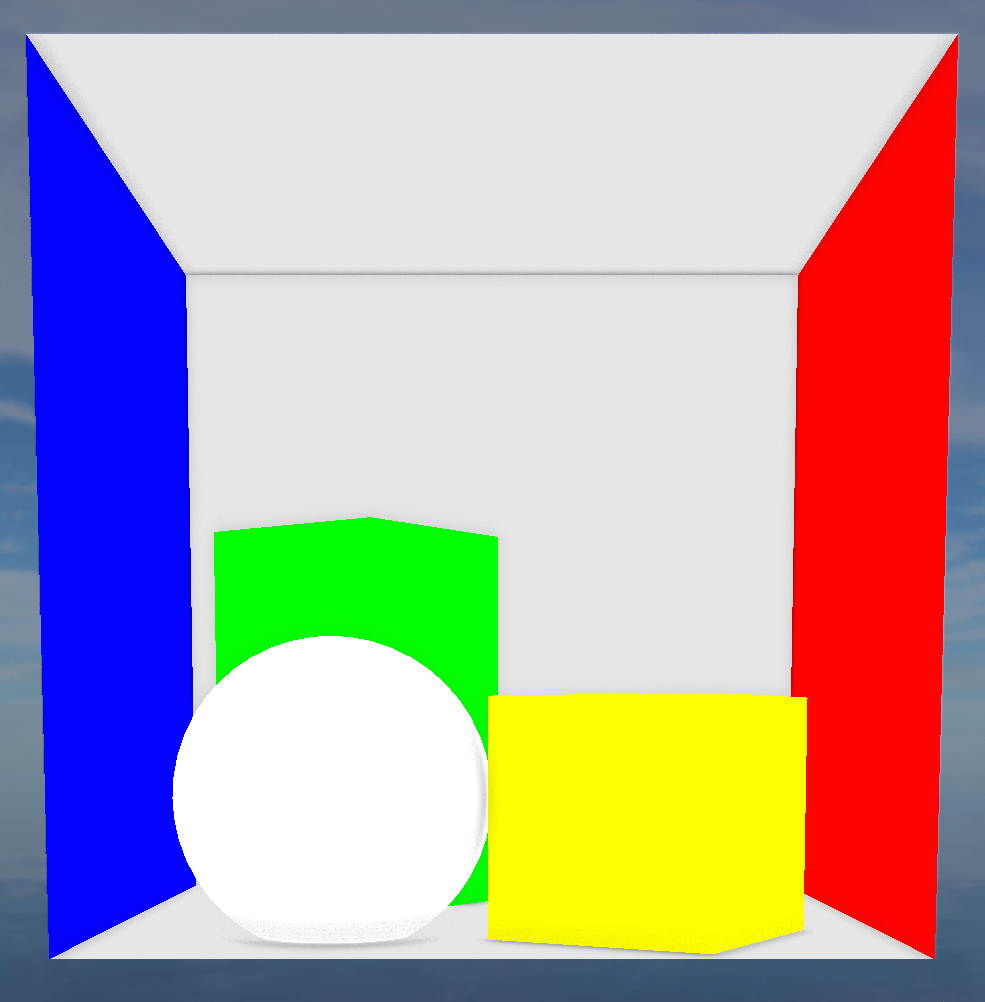
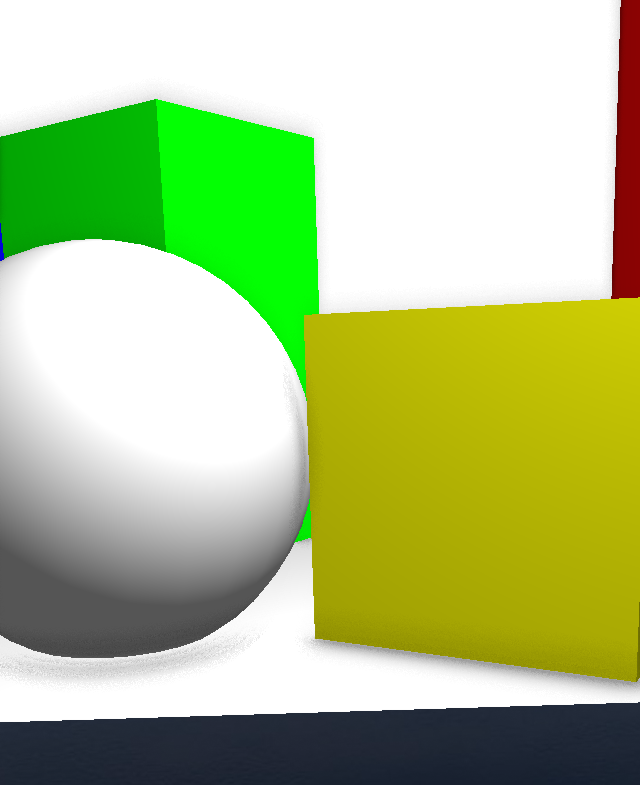
A few SCNTechnique examples
Table of Contents
Introduction
SCNTechnique is an interesting class of the SceneKit library that allows a developer to easily setup a multiple-passes rendering, without having to implement her own framebuffer management code [1]. A technique is assigned to a SCNRenderer (a view, a layer, a frame), and is instantiated from the content of a plist file where each pass is described.
This class is quite powerful when one wants to achieve custom rendering effects while retaining the advantages of the SceneKit engine pipeline.
But the documentation on the subject is limited [2], and the tutorials available online, sparse.
Thus this post. Please note that the examples described below are here to present and explain the SCNTechnique class. They are not always the best ones performance-wise, and some easier implementations might be able to replicate the same effects without relying on SCNTechnique.
Structure of a Technique.plist file
- passes: here you can define each pass. You give it a name, choose its type of drawing : draw the whole scene (DRAW_SCENE), draw a given node (DRAW_NODE + nodeName field) or draw a fullscreen quad (DRAW_QUAD). When drawing the full scene or a set of nodes, you can include or exclude child nodes using category bitmasks.
Then, you indicate the shader program name (the SCNTechnique expects files in the same directory), the inputs (uniforms, attributes) to use for this pass, and the outputs (render targets for color, depth and/or stencil).
You can also choose from which camera the pass should be rendered, with the pointOfView field. Finally, you can set specific options for the color, depth and stencil buffers (clear, format, etc.). - targets: this dictionary contains the intermediary targets, with their names, type (color, depth, stencil) and their format (rgba8, depth24stencil8,...)
- symbols : in this dictionary you define all the uniforms and attributes available in the shaders. Some, like vertex attributes, matrix transforms, time,... are predefined, but you can add images (through sampler2D objects) and define the type of elements computed at runtime.
- sequence : an array containing the names of the passes in the order they should be rendered
A few things:
- the final output is COLOR, but you can also use COLOR and DEPTH as inputs (as sampler2D). In this case, SceneKit automatically performs a first rendering pass equivalent to a DRAW_SCENE.
- if you specify a shader program for a DRAW_SCENE or a DRAW_NODE pass, you have to reimplement everything (MVP transformation, projection, texturing, lighting computations). Fortunately, you can still use the SceneKit default rendering program by not defining the program field.
- you can set the pointOfView field to
kSCNFreeViewCameraNameto access the camera when thedefault camera controls
are enabled. Or you can ignore this field. - you can bind uniforms at runtime. For instance, having the screen resolution can be useful [3]. First, define the uniform in the symbols dictionary, giving its name and type. Here, we would have
"symbols" : { "size_screen" : { "type" : "vec2" }, ...}. Then once thetechniqueis initialised from its dictionnary, we pass it theframe_sizevalue [4]:
technique.setValue(NSValue(CGSize:framesize),forKeyPath: "sizescreen")
We now switch to a few examples. The code of all examples is available on Github.
A first (rainy) example
For the first example, we want to simulate rain running down the screen. There are two steps:
- first pass: render the whole scene in a texture
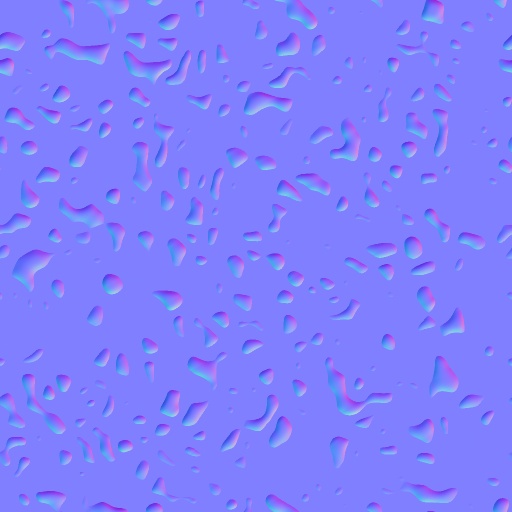
- in a second pass, render a fullscreen quad. For each fragment, we read a vec3 in a normal map (with uv coordinates modified over time for animation). We use the computed normal to read in the texture from the previous step, and display the color on screen.
Our SCNTechnique contains only one defined pass. We use COLOR (as the result of an implicit first pass) and the normal map as inputs, plus the time uniform, and we draw a quad (DRAW_QUAD mode). In the fragment shader, we compute animated uv, read from the normalSampler, compute the normal, and use it to read from the colorSampler, before outputing to the color renderbuffer.
vec2 new_uv = func(uv,time)
vec3 normal = texture2D(normalSampler,new_uv).rgb;
normal = normal * 2.0 - 1.0;
gl_FragColor.rgb = texture2D(colorSampler,fract(uv + normal.xy*0.1)).rgb;
gl_FragColor.a = 1.0;
Result
Implementing a sobel filter
Our second example will use multiple DRAW_QUAD passes. We are going to implement a Sobel filter, used in edge-detections algorithms. A Sobel filter basically approximate the color
(or shade of gray) derivative between adjacent pixels, by doing a 3x3 matrix product. It can be performed vertically and horizontally, to compute a magnitude and an angle.
For each pixel we are going to sample among the eight neighbouring pixels. This implies a lot of texture reads; as OpenGL ES 2 doesn't include the textureOffset function, we will have to perform dependant texture reads for each fragment. We use the separability property of the Sobel filter to lower the number of texture reads and computations. Indeed, the matrix computation can be replaced by two 3x1 vector products. Here, the difference in performances is going to be negligible[5], this is more a pretext to use multiple custom passes than anything else. But for computing a gaussian blur for instance, the separability can really help lower the number of reads and computations to perform.
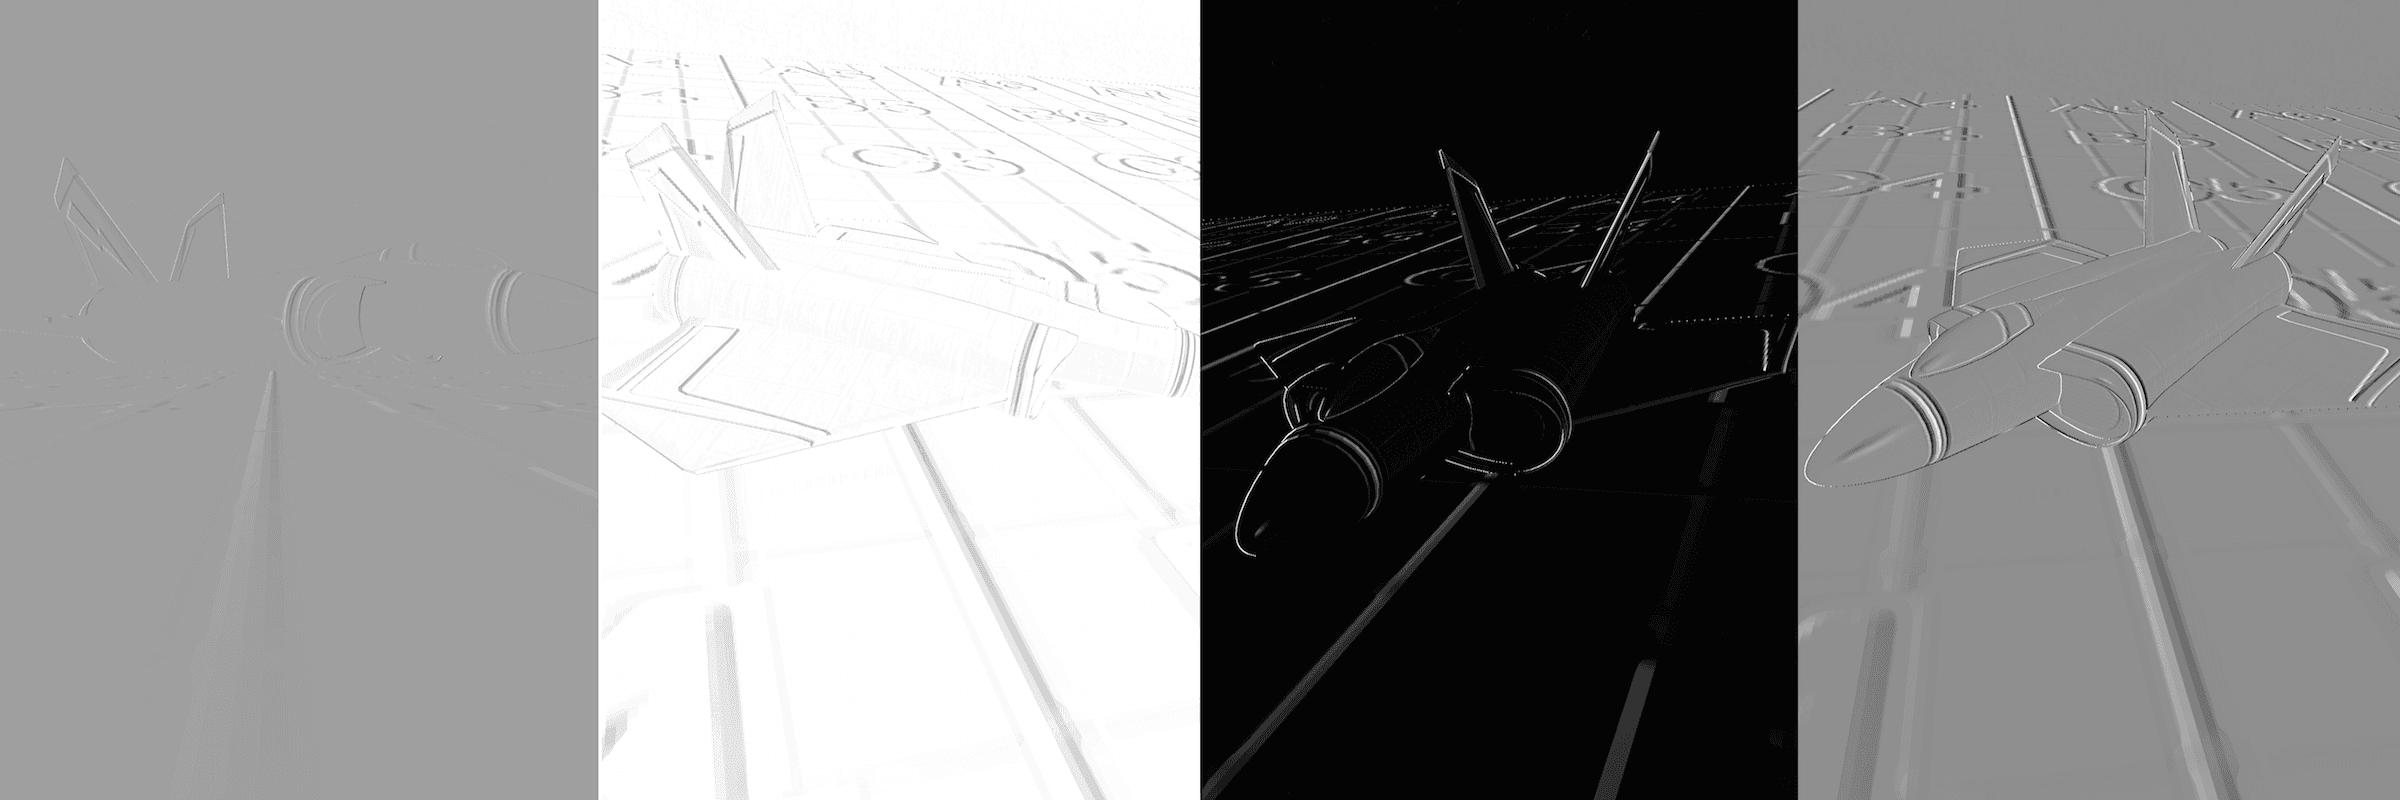
Our SCNTechnique has a DRAW_SCENE default pass and two DRAW_QUAD passes : the first quad pass read from COLOR and performs the first vector computation. It writes the result to an intermediary target, in the R channel for the x-filter and the G channel for the y-filter. Then, the second quad pass reads from this target and performs the second vector computation, before outputing the result as a black and white picture. It can also compute the magnitude and angle of the gradient.
First fragment shader:
//Compute the first pass of Gx : [1 0 -1]
float t_x_0 = 1.0 * rgb_2_luma(texture2D(colorSampler,uv+vec2(-1.0,0.0)/size).rgb);
float t_x_2 = -1.0 * rgb_2_luma(texture2D(colorSampler,uv+vec2(1.0,0.0)/size).rgb);
float gx1 = (t_x_0 + t_x_2);
//gx1 between -1 and 1
gl_FragColor.r = 0.5*gx1+0.5;

//Compute the first pass of Gy : [1 2 1]
float t_y_0 = 1.0 * rgb_2_luma(texture2D(colorSampler,uv+vec2(0.0,-1.0)/size).rgb);
float t_y_1 = 2.0 * rgb_2_luma(texture2D(colorSampler,uv+vec2(0.0,0.0)/size).rgb);
float t_y_2 = 1.0 * rgb_2_luma(texture2D(colorSampler,uv+vec2(0.0,1.0)/size).rgb);
float gy1 = (t_y_0 + t_y_1 + t_y_2);
//gy1 between 0 and 4
gl_FragColor.g = 0.25*gy1;
Second fragment shader:
//Compute the second pass of Gx : [1 2 1]^T
float t_x_0 = 1.0 * texture2D(colorSampler,uv+vec2(0.0,-1.0)/size).r*2.0-1.0;
float t_x_1 = 2.0 * texture2D(colorSampler,uv+vec2(0.0,0.0)/size).r*2.0-1.0;
float t_x_2 = 1.0 * texture2D(colorSampler,uv+vec2(0.0,1.0)/size).r*2.0-1.0;
//float gx2 = (t_x_0 + t_x_1 + t_x_2)*0.125+0.5;//used when outputing x-filter separately
float gx2 = (t_x_0 + t_x_1 + t_x_2);

//Compute the second pass of Gy : [1 0 -1]^T
float t_y_0 = 1.0 * texture2D(colorSampler,uv+vec2(-1.0,0.0)/size).g*4.0;
float t_y_2 = -1.0 * texture2D(colorSampler,uv+vec2(1.0,0.0)/size).g*4.0;
//float gy2 = (t_y_0 + t_y_2)*0.125+0.5;//used when outputing y-filter separately
float gy2 = (t_y_0 + t_y_2);

//Compute magnitude (or angle)
float mag = sqrt(gx2*gx2+gy2*gy2);
//float theta = atan(gy2,gx2);
gl_FragColor.rgb = vec3(mag*0.5);
Results (with various normalizations modes)
Results depend a lot on the various normalizations steps used. As we don't have the hand on the rendertargets configuration, SCNTechnique prevents us from using floating point framebuffers.
Reflections on a plane
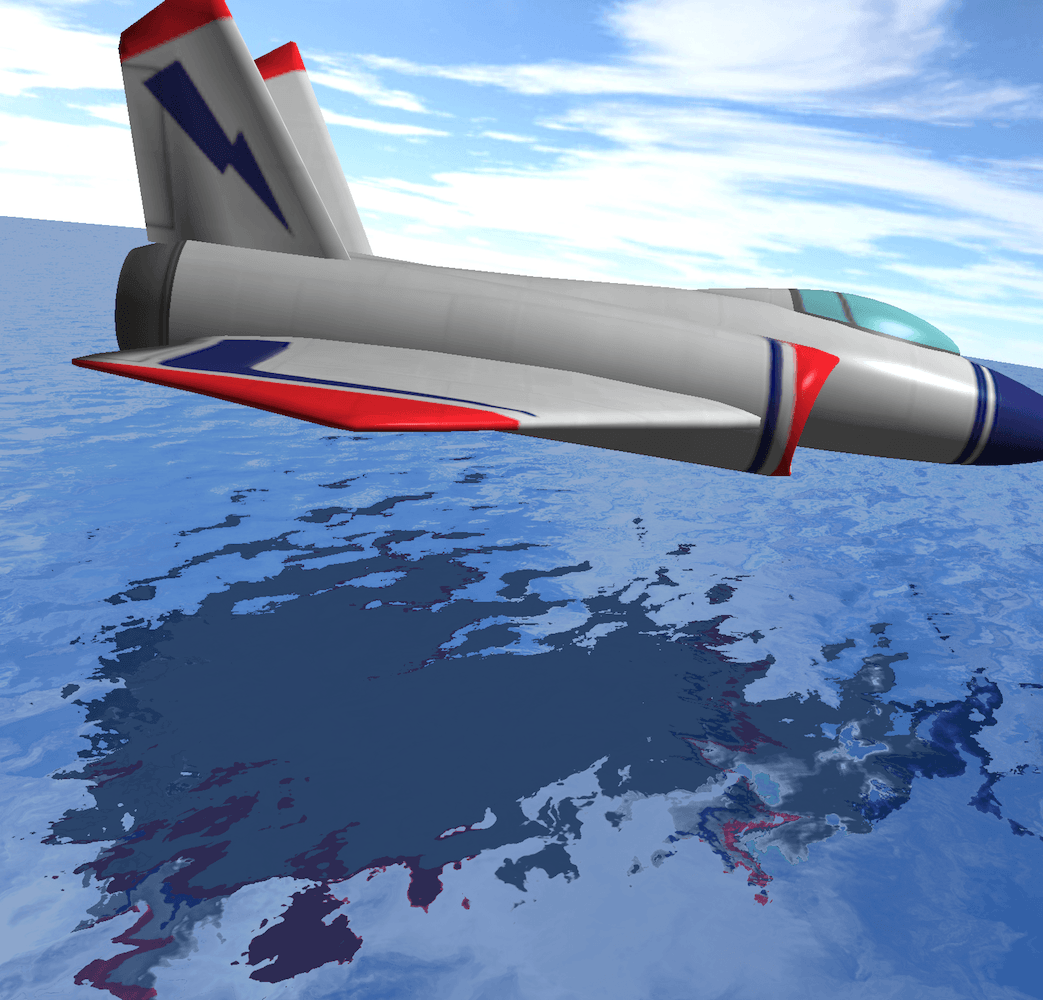
We now implement a classical framebuffer exercise : planar reflections. Imagine an object (here a plane) above a water surface. How to render the reflections of the plane and the sky on the surface of the water ? One way of doing it is to render the scene from a point of view under the water plane, as shown on this figure :
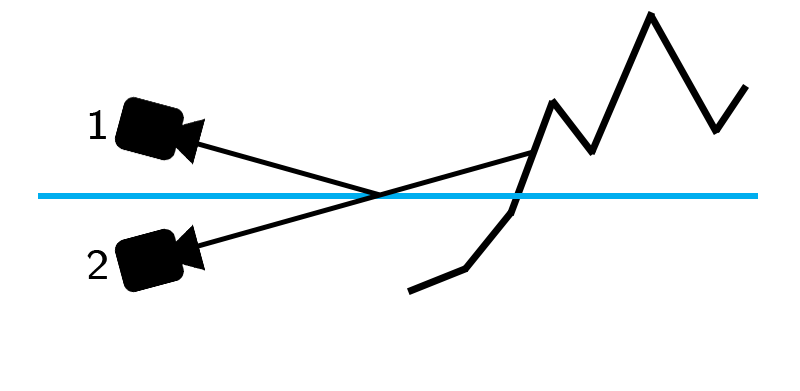
By flipping this rendered picture vertically and texturing the water plane in screen-space with it, we can achieve this effect. Furthermore, by using a normal map, we can reproduce the perturbations of reflections on the water.
Usually, you would render the whole scene seen from under in a texture, and use it in the shader linked to the water plane. But you can't pass the intermediary color target as a uniform texture in an object's shader outside of the technique's shaders. Everything has to be managed during a SCNTechnique pass where you only render the node you want to use the texture with.
An alternative is to use a stencil buffer, to render the water plane in the same renderbuffer as the whole scene by using a mask. But I'm not used to work with stencils, and as I wasn't getting any result despite all my good will, I've chosen to use the depth buffer instead for mixing the scene and the water plane together.
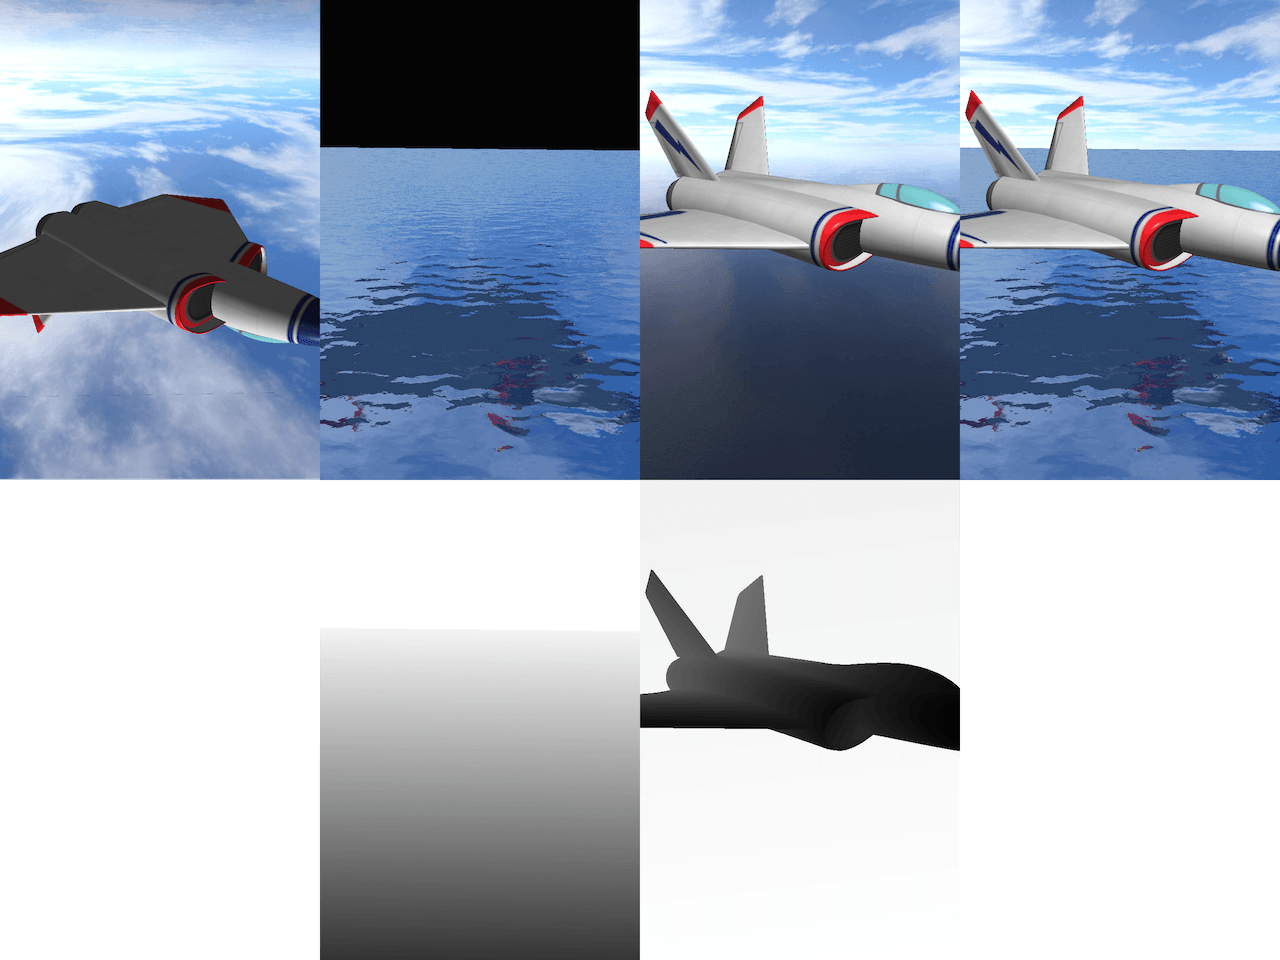
So, we have four passes :
- first, render the scene seen from below the water plane, with the aforementioned plane hidden.
- then, render the water plane alone, using the output from the previous pass to texture the plane, using the normal map to perturb the texture reads. We also keep the depth buffer.
- in a third pass, render the whole scene except the water plane, from the regular point of view, and keep the depth buffer.
- in a last pass, render a fullscreen quad, using the two previous depth buffers to mix the renders from the second and third passes.
The color and depth renders of each pass are shown above. The two importants shaders are the one to render the water plane, and the one that performs the final mix.
Water rendering:
//----Vertex shader----

attribute vec4 a_position;
attribute vec2 a_texcoord;
uniform mat4 mvp;
varying vec2 uv;

void main() {
    gl_Position = mvp * a_position;
    uv = a_texcoord;
}

//----Fragment shader----

uniform sampler2D colorSampler;
uniform sampler2D normalSampler;
uniform vec2 size;
uniform float u_time;
varying vec2 uv;

void main() {
    vec2 uv_1 = gl_FragCoord.xy / size.xy;
    vec3 normal = texture2D(normalSampler,fract(uv*10.0+vec2(0.0,u_time*0.1))).rgb * 2.0 - 1.0;
    gl_FragColor.rgb = mix(vec3(0.1,0.3,0.6),texture2D(colorSampler,vec2(uv_1.x,1.0-uv_1.y)+normal.xy*0.1).rgb,0.5);
}
Final mix:
//----Vertex shader----

attribute vec4 a_position;
varying vec2 uv;

void main() {
    gl_Position = a_position;
    uv = (a_position.xy + 1.0) * 0.5;
}

//----Fragment shader----
uniform sampler2D sampler_color_scene;
uniform sampler2D sampler_depth_scene;
uniform sampler2D sampler_color_plane;
uniform sampler2D sampler_depth_plane;
uniform float u_time;
varying vec2 uv;

void main() {
    float depth = texture2D(sampler_depth_scene,uv).r;
    float depth_plane = texture2D(sampler_depth_plane,uv).r;
    if (depth == 1.0 && depth_plane == 1.0){
        //Special case: if both depths are 1, we show the scene
        gl_FragColor = texture2D(sampler_color_scene,uv);
    } else if (depth == 1.0){
        //depth_plane < depth_scene = 1.0, we show the plane
        gl_FragColor = texture2D(sampler_color_plane,uv);
    } else if (depth_plane <= depth){
        //depth_plane <= depth_scene, we show the plane
        gl_FragColor = texture2D(sampler_color_plane,uv);
    } else {
        //else we show the scene
        gl_FragColor = texture2D(sampler_color_scene,uv);
    }
}
Result
In its current state, SceneKit seems to have a bug when using a custom scene background. Whether it is a color, an image or a cubemap, the
scene.backgroundproperty is not rendered in a pass as soon as you're not rendering the whole scene with all nodes included.[6] I had to use an inverted cube as a substitution cubemap (you can notice the difference with the other scenes).
A basic SSAO
Screen space ambient occlusion is a post-processing method to add more details to lighting and shadow in a scene. The general idea is to use positions and normals of each object's surface in screen-space to infer where objects are close enough to shadows each other and limit the amount of received light. Two explanations/tutorials are A simple and practical approach to SSAO and this SSAO tutorial.
For each fragment, we randomly sample points around it. For each of those points we get the corresponding normal and depth; we can then compute their positions, and compare them with the fragment's position. If they are physically close, and if the surfaces at those points are oriented in a certain way, this means that the light reaching each of the surfaces is partially blocked, and there should be a diffuse shadow.
We will have three passes :
- the first one is the default DRAW_SCENE pass, where we only use ambient lights. We also store the depth buffer for later.
- in a second pass we render the scene, computing the normal in screen space at each point/fragment.
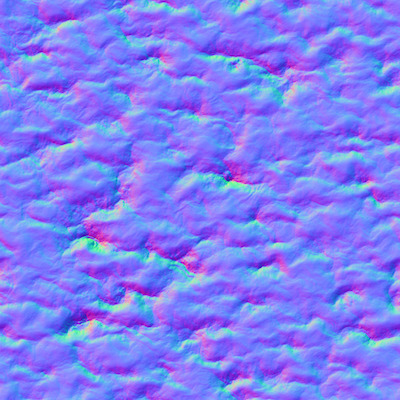
- then, in a third pass we can apply the procedure described above. For the random sampling we use a small (64x64) normal map that provides us random shifts when choosing the points.

The random sampling normal map
We procede with the remaining computations. Once the AO term is computed, we mix it with the ambient color from the first pass, and draw it on a screen-quad. This gives us the final result.
First pass
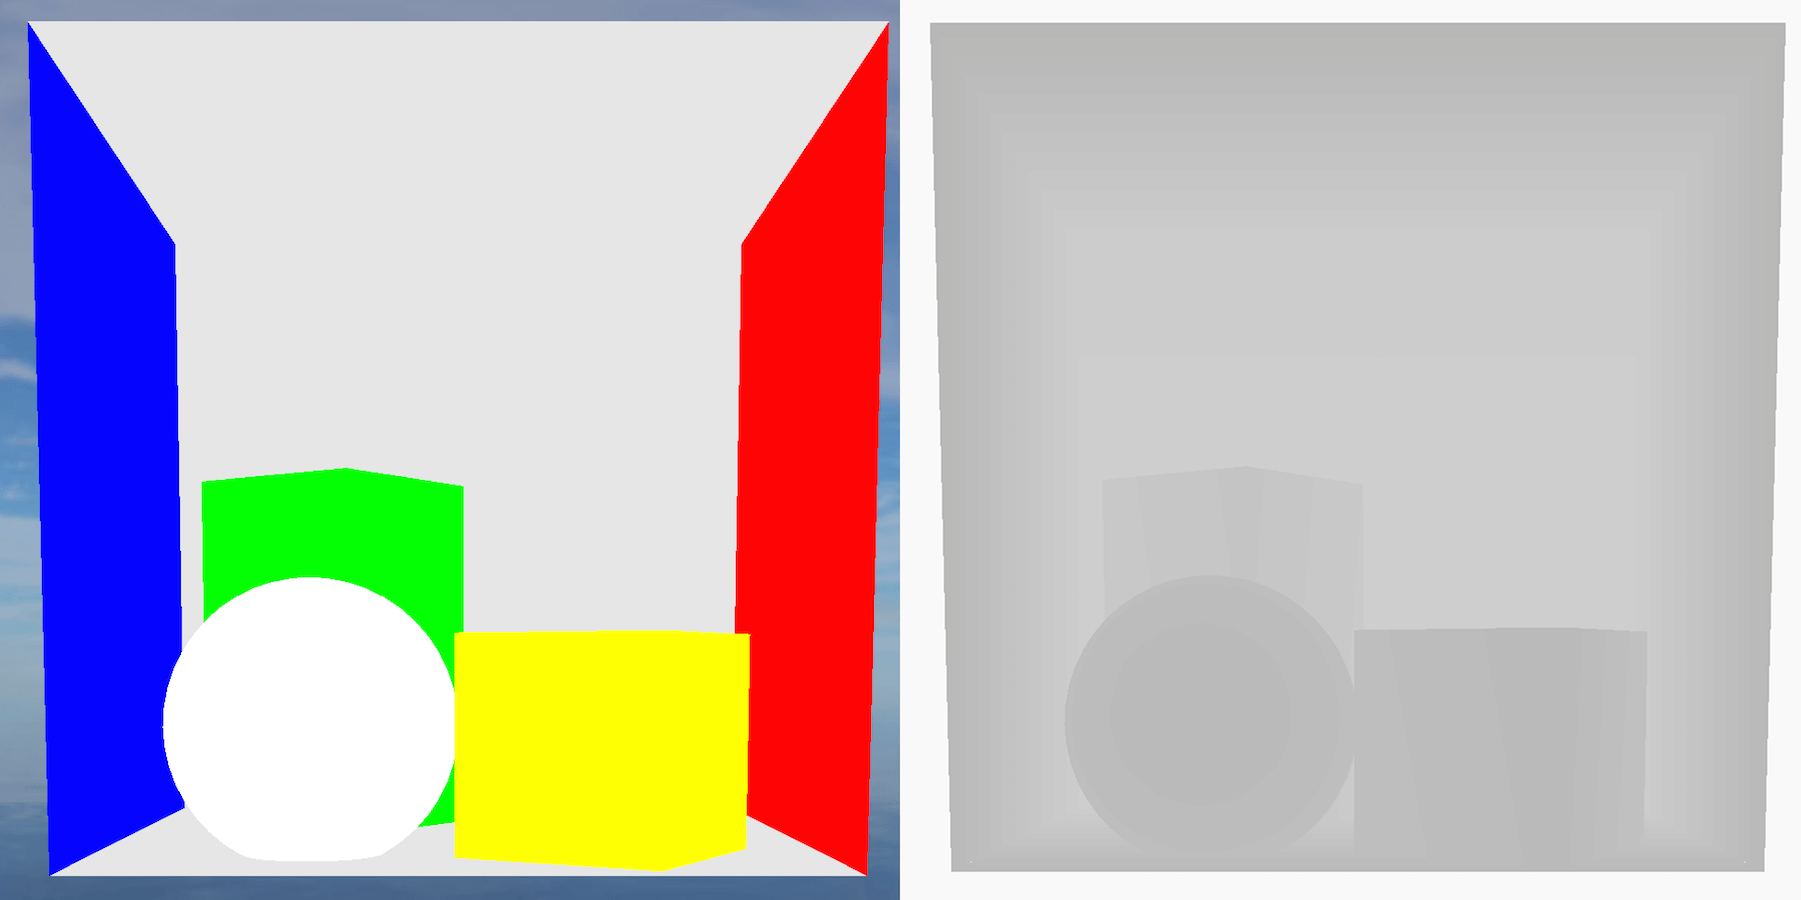
(color and depth)
Second pass
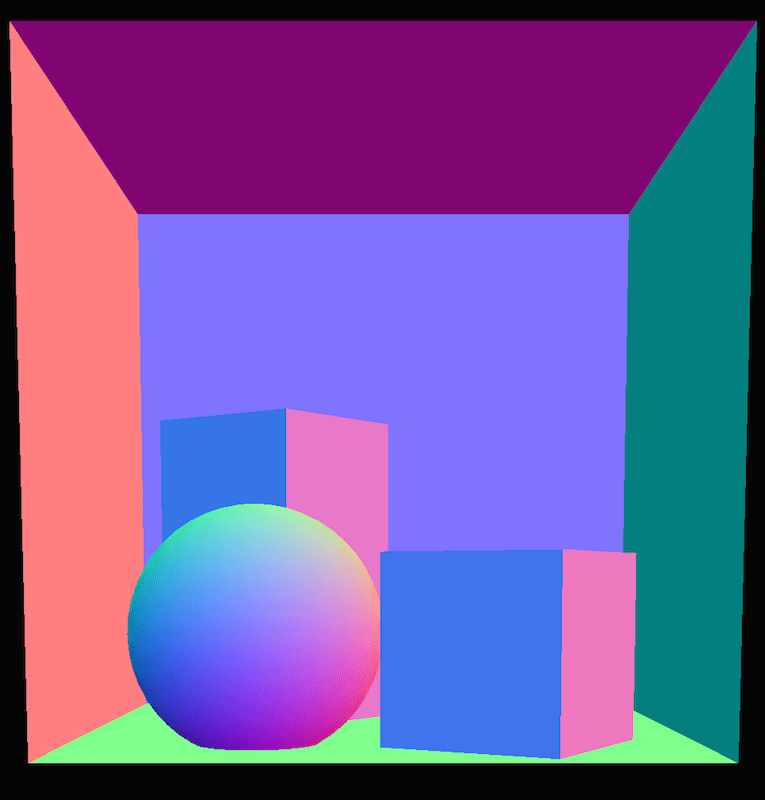
(normals)
The shader code for the second pass is just here to output the normal at each fragment in the color target.
//----Vertex shader----
attribute vec4 a_position;
attribute vec4 a_normal;
uniform mat4 mvp;
uniform mat4 nor_mat;
varying vec3 normal;

void main() {
    gl_Position = mvp*a_position;
    //nor_mat is the precomputed normal matrix, to move from model to screen space.
    normal = (nor_mat * a_normal).xyz;
}

//----Fragment shader----
varying vec3 normal;
uniform vec2 size;

void main() {
    gl_FragColor.rgb = normalize(normal) * 0.5 + 0.5;
    gl_FragColor.a = 1.0;
}
Third pass
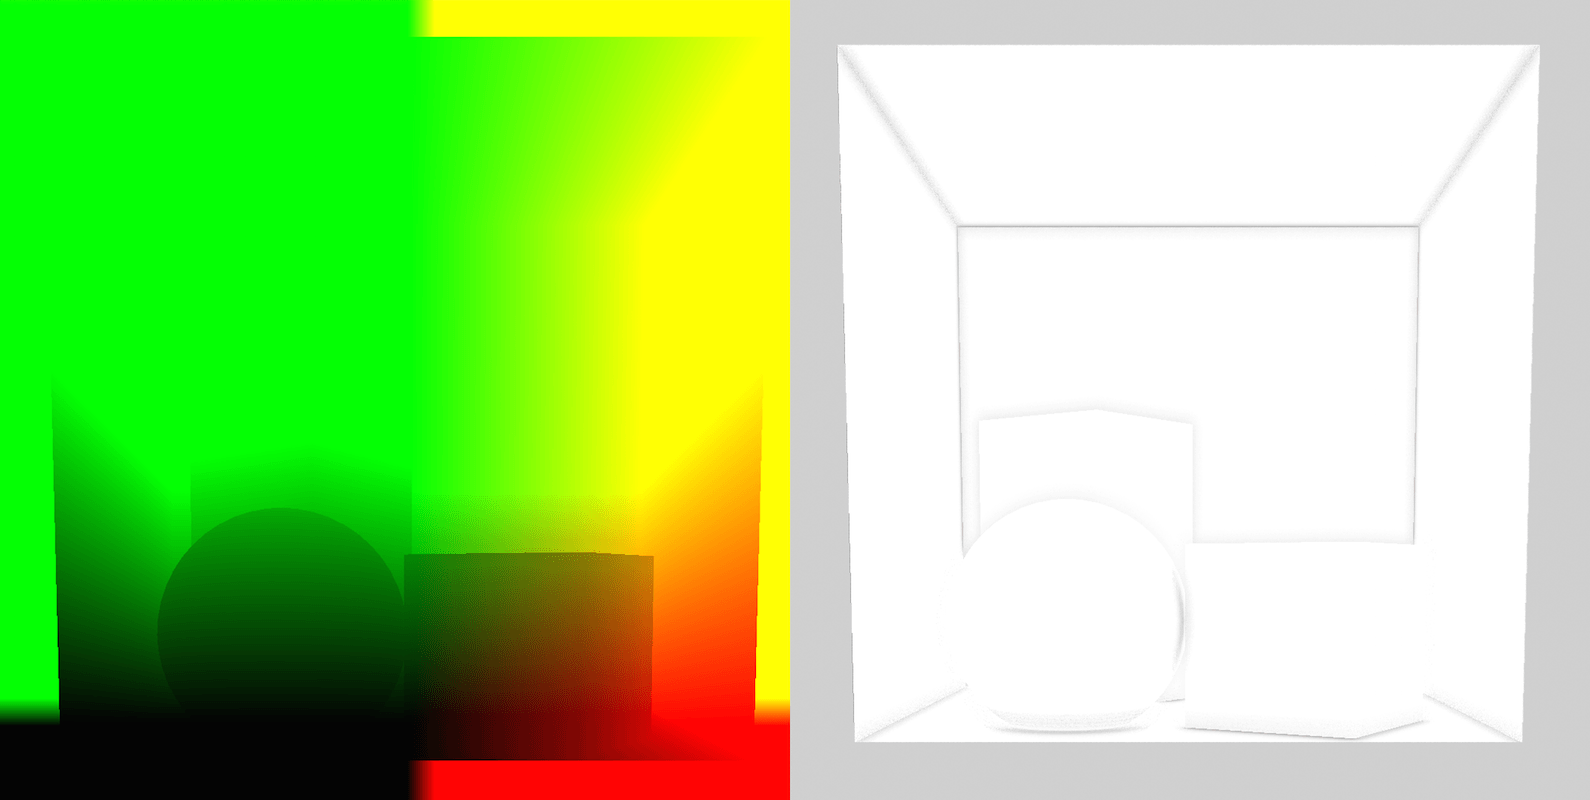
(positions and AO result)
The code for the third pass is more complex. SSAO relies on a lot of settings with various and scene-specific effects on the result. We also have to compute positions based on the depth buffer content.
//----Vertex shader----
attribute vec4 a_position;
varying vec2 uv;

void main() {
    gl_Position = a_position;
    uv = (a_position.xy + 1.0) * 0.5;
}

//----Fragment shader----
uniform sampler2D normalSampler;
uniform sampler2D noiseSampler;
uniform sampler2D depthSampler;
uniform sampler2D colorSampler;
varying vec2 uv;
uniform vec2 size;

const float thfov = 0.5773502692;//precomputed base on the fov
const float projA = 1.0101010101;//precomputed factor based on zfar and znear
const float g_scale = 1.0;
const float g_bias = 0.2;
const float g_sample_rad = 0.001;
const float g_intensity = 1.5;

//No uniform or const array in GLSL ES 1.0
vec2 pseudoSampleArray(int index){
    if(index==0){return vec2(1.0,0.0);
    } else if (index==1) {return vec2(-1.0,0.0);
    } else if (index == 3) {return vec2(0.0,1.0);
    } else { return vec2(0.0,-1.0); }
}

//Compute the 3D position of a point given in screen space using depth
vec3 getPosition(vec2 uv_c) {
    vec2 ndc = uv_c * 2.0 - 1.0;
    float aspect = size.x / size.y;
    vec3 viewray = vec3(ndc.x * thfov * aspect,ndc.y * thfov,-1.0);
    float linear_depth = -projA/(texture2D(depthSampler,uv_c).r - projA);
    vec3 pos = linear_depth / 100.0 * viewray;
    return pos;//*0.8;
}

//Compute the AO participation for the origin point
float computeAO(vec2 uv, vec2 shift, vec3 origin, vec3 normal) {
    vec3 diff = getPosition(uv + shift) - origin;
    vec3 n_diff = normalize(diff);
    float d = length(diff)*g_scale;
    return (1.0-n_diff.z*0.9)*max(0.0,dot(normal,n_diff)-g_bias)*(1.0/(1.0+d))*g_intensity;
}

void main() {
    vec3 normal = normalize(texture2D(normalSampler,uv).rgb * 2.0 - 1.0);
    vec3 position = getPosition(uv);
    //Reading in the 64x64 noise texture
    vec2 random_normal = normalize(texture2D(noiseSampler, uv * size/vec2(64.0,64.0)).xy * 2.0 - 1.0);
    float ao = 0.0;
    //Radius inv. prop. to the depth of the point
    float radius = g_sample_rad/abs(position.z);
    int iter = 4;
    for(int i = 0;i < iter;i++){
        //We use the random_normal combined with a reflection to sample 4 points at each iteration
        vec2 coord1 = reflect(pseudoSampleArray(i),random_normal) * radius;
        vec2 coord2 = vec2(0.707 * coord1.x - 0.707 * coord1.y, 0.707 * coord1.x + 0.707 * coord1.y);
        ao += computeAO(uv,coord1 * 0.25, position,normal);
        ao += computeAO(uv,coord2 * 0.5, position,normal);
        ao += computeAO(uv,coord1 * 0.75, position,normal);
        ao += computeAO(uv,coord2, position,normal);
    }
    //normalization
    ao /= (float(iter) * 4.0);
    //We apply the AO to the color input
    gl_FragColor.rgb = (1.0-ao)*texture2D(colorSampler,uv).rgb;
    gl_FragColor.a = 1.0;
}
Final Result
And here is a version with a stronger SSAO, using modified position scale.
And finally a close-up using a full Phong light rendering instead of just ambient, mixed with AO.
Wrap up
And that's it, enough SCNTechnique examples for today! The code of all those demos (wrapped up in an iOS app) is available on Github. As you can see SCNTechnique has some limitations, but remains a great way to implement a multi-passes rendering in SceneKit. The performances are quite good as long as you stay in the limits of what OpenGL ES allows (especially the shading language). Hopefully iOS 9 will change this for the most recent devices[7]. The tools provided for debugging GPU code are also great and allow you to better understand how SceneKit runs under the hood, and to correct and refine your code. There are still a few bugs or unexplained behaviours that remain and can make your SceneKit life harder, but it is overall a great engine with good performances and useful tools.
-
by overriding the SceneKit rendering engine ↩
-
the SCNTechnique documentation page and a few lines of code in bigger demo projects ↩
-
you don't have access to textureSize with OpenGL ES 2, for instance ↩
-
typically
view.frame.size, scaled for Retina screens ↩ -
because of the zeroes in the Sobel matrix ↩
-
with the ability to switch between OpenGL ES 2, 3 and Metal depending on the device GPU capacities ↩

