Lantern, part 2
Table of Contents
This week, I worked on lighting and improving general quality.
Lighting
Lighting is an important part of creating the mood of the scene. I needed to recreate the warm moving light of a lantern's flame at night.
Lights
After much tinkering, I've chosen to put three lights in the scene: - an omnidirectional light which is the main component of the lantern flame, with a vivid yellow/orange color. - a spotlight, placed inside the lantern too, and pointed downwards. Its main purpose is to generate a projected shadow, an option only available on spotlight [1]. - a second omni light with a blue tint, to allow the player to see even in unlit areas without relying on an ambient light that would light the whole scene uniformly. Using the complementary color of the main light strengthens the contrast.
Animations
The two lantern-related lights are animated to create the illusion of a fire. Their position is shifted periodically and their intensity is modified. Both animations are loop of around 20 seconds generated at launch, using random values for shifts in position and intensity. This gives a good approximation of the oscillating light of a flame.
As mentionned before, the spotlight use a real-time shadowmap rendered in a first pass to decide which areas are in a projected shadow or not. I'm unsure about keeping this: it's great because the projected shadow follows the animations, but projecting a simple predefined black-and-white picture with static shadows drawn from the light point of view [2] might be better performance-wise.
Particles
When playing with SceneKit, I discovered the particle editor included in Xcode. It provides a few templates (rain, leaves, stars, bokeh...) that are quite easy to tweak. I created some flying embers, with a low birth rate and some color variability. They help bringing details to the scene, with no visible performance hit. Future improvements could be to use some small-sized shapes instead of wide circles for those particles.
Quality
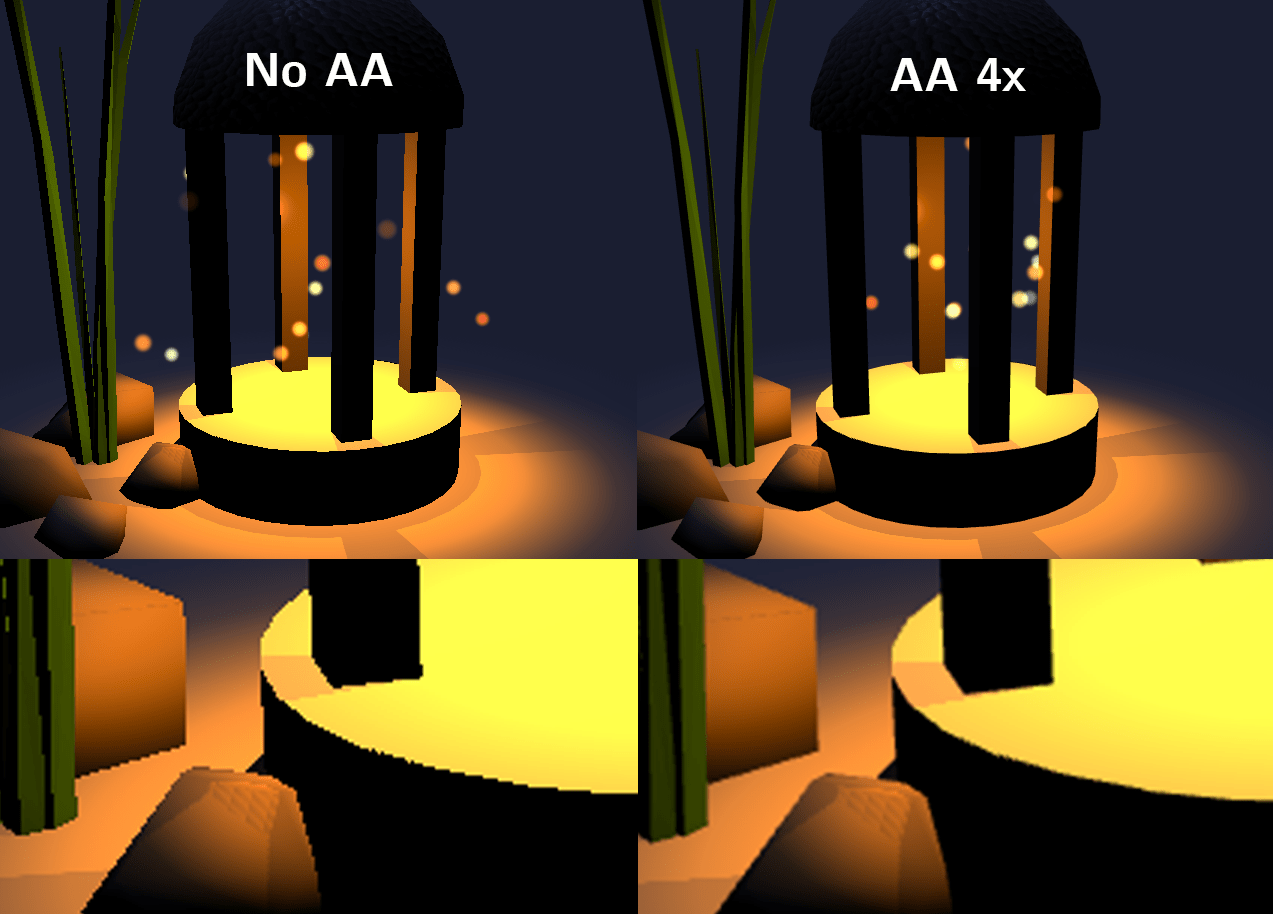
As someone noticed last week, antialiasing was disabled on the screenshots. This means that for instance straight lines can suffer from a staircase effect, and other quality-degrading effects. When using SceneKit on iOS AA is disabled by default for performance reasons. The antialiasing provided is using the multisampling method: the scene is rendered at a higher resolution and then downscaled. As the scene is simple here, enabling it at a 4x level has no hit on performances[3].
Another optimisation is called jittering, used to avoid patterns and moiré effects when rendering objects far from the viewer or with patterned textures[4]. Here, the scene is close to the viewer, so for now I'm keeping it disabled.
And that's all for this week! Next time, I'm going to digress and talk about SCNTechnique, an interesting way of implementing multi-pass rendering without having to handle framebuffers by yourself.


